
This was a thoroughly engaging and useful session in which staff from the Civil Engineering met to share ideas and insights on their teaching practice. Here is a summary of the five presentations (which were also recorded. See the Civil Engineering section in SEMS Moodle Guidance).
Echo 360 – Sarah Stallebrass
Sarah gave a demonstration of Echo 360, the lecture capture system. She explained how it helps students who miss lectures. These are the ones most likely to fail.

Echo360 presentation
Echo 360 records lectures and enables students to revisit the content. Given the diverse topic area Sarah teaches (geology) she says it helps students revise even when they may not have any notes to work from. Importantly, according to Sarah, the system does not seem to deter students from coming to her lectures.
Echo 360 works by recording lectures in one of three ways.
- Audio
- Audio and projector
- Audio, projector and video
Sarah recommends the second option for most purposes since the third does not add much to the final presentation. She acknowledged some limitations, such as the whiteboard not being recorded, but was very enthusiastic about the technology in general.
Simplicity is probably its biggest selling point and it only needs to be requested through Service Now to become available. This has to be done 48 hours in advance. Once in the classroom the recording will take place automatically. All you need to do is make sure the microphone and projector are turned on.
The only time-consuming consideration is that each speaker will need give his or her permission to be recorded. This happens when the form is filled out. If any material needs to removed, this can be done easily using the basic editor supplied. The final step is to add an Echo360 block to the module and your job is done!
Clickers – Andrew McNamara
Clickers in the classroom
Andrew recommends using clickers as a way to ensure students are taking notes. He uses clickers two or three times a year for in-class quizzes. By encouraging them to take notes he finds the students become more actively involved in their learning. To further encourage note-taking he does not to give them any PowerPoint slides.
The format of the quizzes is something like ‘Who Wants to be a Millionaire’. He says that 15 questions are easily possible in a one hour session. The instant feedback means he can dwell on questions where students have struggled. At the end of the session the students enjoy seeing who has performed the best, which is a big motivation for them.
Clickers are easy to set up and use. The Turning Point software needs to be installed on your machine. Andrew noted that IS can take a long time to do this (you make the request through Service Now). Once installed you open Turning Point and then PowerPoint from inside there. You can then formulate the questions in advance of the session. The results can be downloaded to Excel.
The biggest headache with using clickers is handing them out and getting them back again. Andrew allocates clickers to specific students so their results can be tracked. In a class of up to a 100 this can take ten minutes or so. He has thought about a solution to this in which each student keys in a unique ID at the beginning of the session. This could save a lot of time but the idea needs to be developed. That aside, clickers are a really useful way of engaging students and in this case develop their note-taking skills.
Advanced Quiz Functionality – Shiqiang Yan
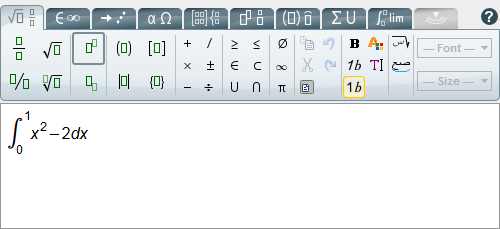
WIRIS editor
One of the challenges of setting quiz questions in Moodle is to make them applicable to students who deal with mathematical problems. Moodle is equipped with some sophisticated features in this respect. Shiqiang gave an excellent introduction.
He first pointed out rather obscure location of the questions themselves. For those who remain puzzled you first have to go into the quiz settings (editing turned on) at which point up in the Settings menu, at the top of the page, a link to Quiz administration will have materialised! From here you can get to the quiz questions and other important stuff.
There are three question types specific to Moodle and a further six provided by a third party plugin WIRIS that give you the advanced functionality.
- Calculated
- Calculated multichoice
- Calculated simple
WIRIS
- Essay – math & science
- Matching – math & science
- Cloze – math & science
- Multiple choice – math & science
- Short answer – math & science
- True/False – math & science
Each of the question types allows you to use variables in questions, answers and feedback. The advantage is that students receive individually tailored questions. This makes it much more difficult for them to copy one another.
For questions that involve more complex mathematical notation it is best to use the WIRIS type questions. They can calculate the answers to things like quadratic equations. WIRIS uses Java Applets to provide a graphical interface and it should be noted that you will need Java installed on your machine. You may need to get IS to do this for you.
The scope of what can be achieved is impressive but if you have not used WIRIS before you will certainly need help to begin with. Shiqiang recommended Educational technology Guidance as a starting point. He also kindly offered his own services to help get you started.
Adding Grades to Gradebook – Richard Goodey

Calculated grade
The Gradebook is not everyone’s idea of a design success but given some ingenuity it can be mastered!
Richard described his method for dealing with the inbuilt aggregation methods. These are the numerous ways that you can direct Moodle to add up grades within a category. They come in various guises such as the Simple weighted mean of grades method and the similarly named but entirely different Weighted mean of grades method. Richard doesn’t use any of them!
Instead he gets Moodle to calculate the grade using his own formulas. Richard demonstrated how you can reference any column you like and use the resulting value in a simple calculation to provide a weighting for each grade item.
It is fair to say that in most cases you could achieve the same result by using one of the aggregation methods but the calculations would be hidden from you. By adding your own calculations you can be sure the grades are being worked out the way you want.
Having described how calculations can be used, Richard went on to demonstrate how he exports the Gradebook to Excel, does the marking, then reimports. This method of grading is favoured by the many users who find Excel easier to use than Gradebook. For more information go to the Feedback and Grading section of the Educational Technology Guidance.
Quote of the Day – Brett McKinley
Glossary item
Brett McKinley has found an excellent way of keeping his modules looking fresh and dynamic. Brett uses the Random Glossary Entry block to provide an ever changing side-feature to his Moodle pages. The feature enables you to create a database of glossary items. The content is not limited to text and Brett has made good use of images. Interestingly, he is keen to deploy hand-drawn sketches. He makes these by drawing on paper and then scanning the results into a drawing package where he can add shading and so on.
The glossary items act as a constant reminder of the key principles underlying the module. They add visual impact to his pages and they reinforce the idea that the module is new and up-to-date.
A glossary can be created straightforwardly by clicking on Add an activity or resource and then choosing Glossary. The items themselves can then be added to the glossary. Once present, a pool of glossary items can also be used to populate a Random Glossary Entry block, which is what Brett has done. In this case the glossaries are constructed by him for the students but there is nothing to stop the students producing their own glossaries or even working collaboratively on one.


Leave a Reply